News / How to Log an Activity
How to Log an Activity
- One form handles everything: feedings, sheds, weights, pairings, locks, ovulations, health holds, and more
- 15 seconds per entry. Select animal, pick activity type, save
- 16 activity types from Took Meal through Deceased, each feeding into the right dashboard stats
- QR code shortcut: Scan an animal's QR code to open the form with that animal pre-selected
- Bulk Feed lets you log multiple feedings at once during feeding rounds
The Activity form is how you log everything that happens with your animals. Feedings, sheds, weights, pairings, locks, ovulations, and more. Every activity you log feeds into the Dashboard stats, feeding analysis, breeding pipeline, and animal timelines. One form handles all of it.
Steps
Step 1: Open the Activity Form
Click the Activity button in the Quick Actions area of the sidebar. This opens the Add Activity form as a full-screen overlay on top of whatever page you are on.
You can also open the Activity form by scanning an animal's QR code with your phone camera, which pre-selects that animal automatically.
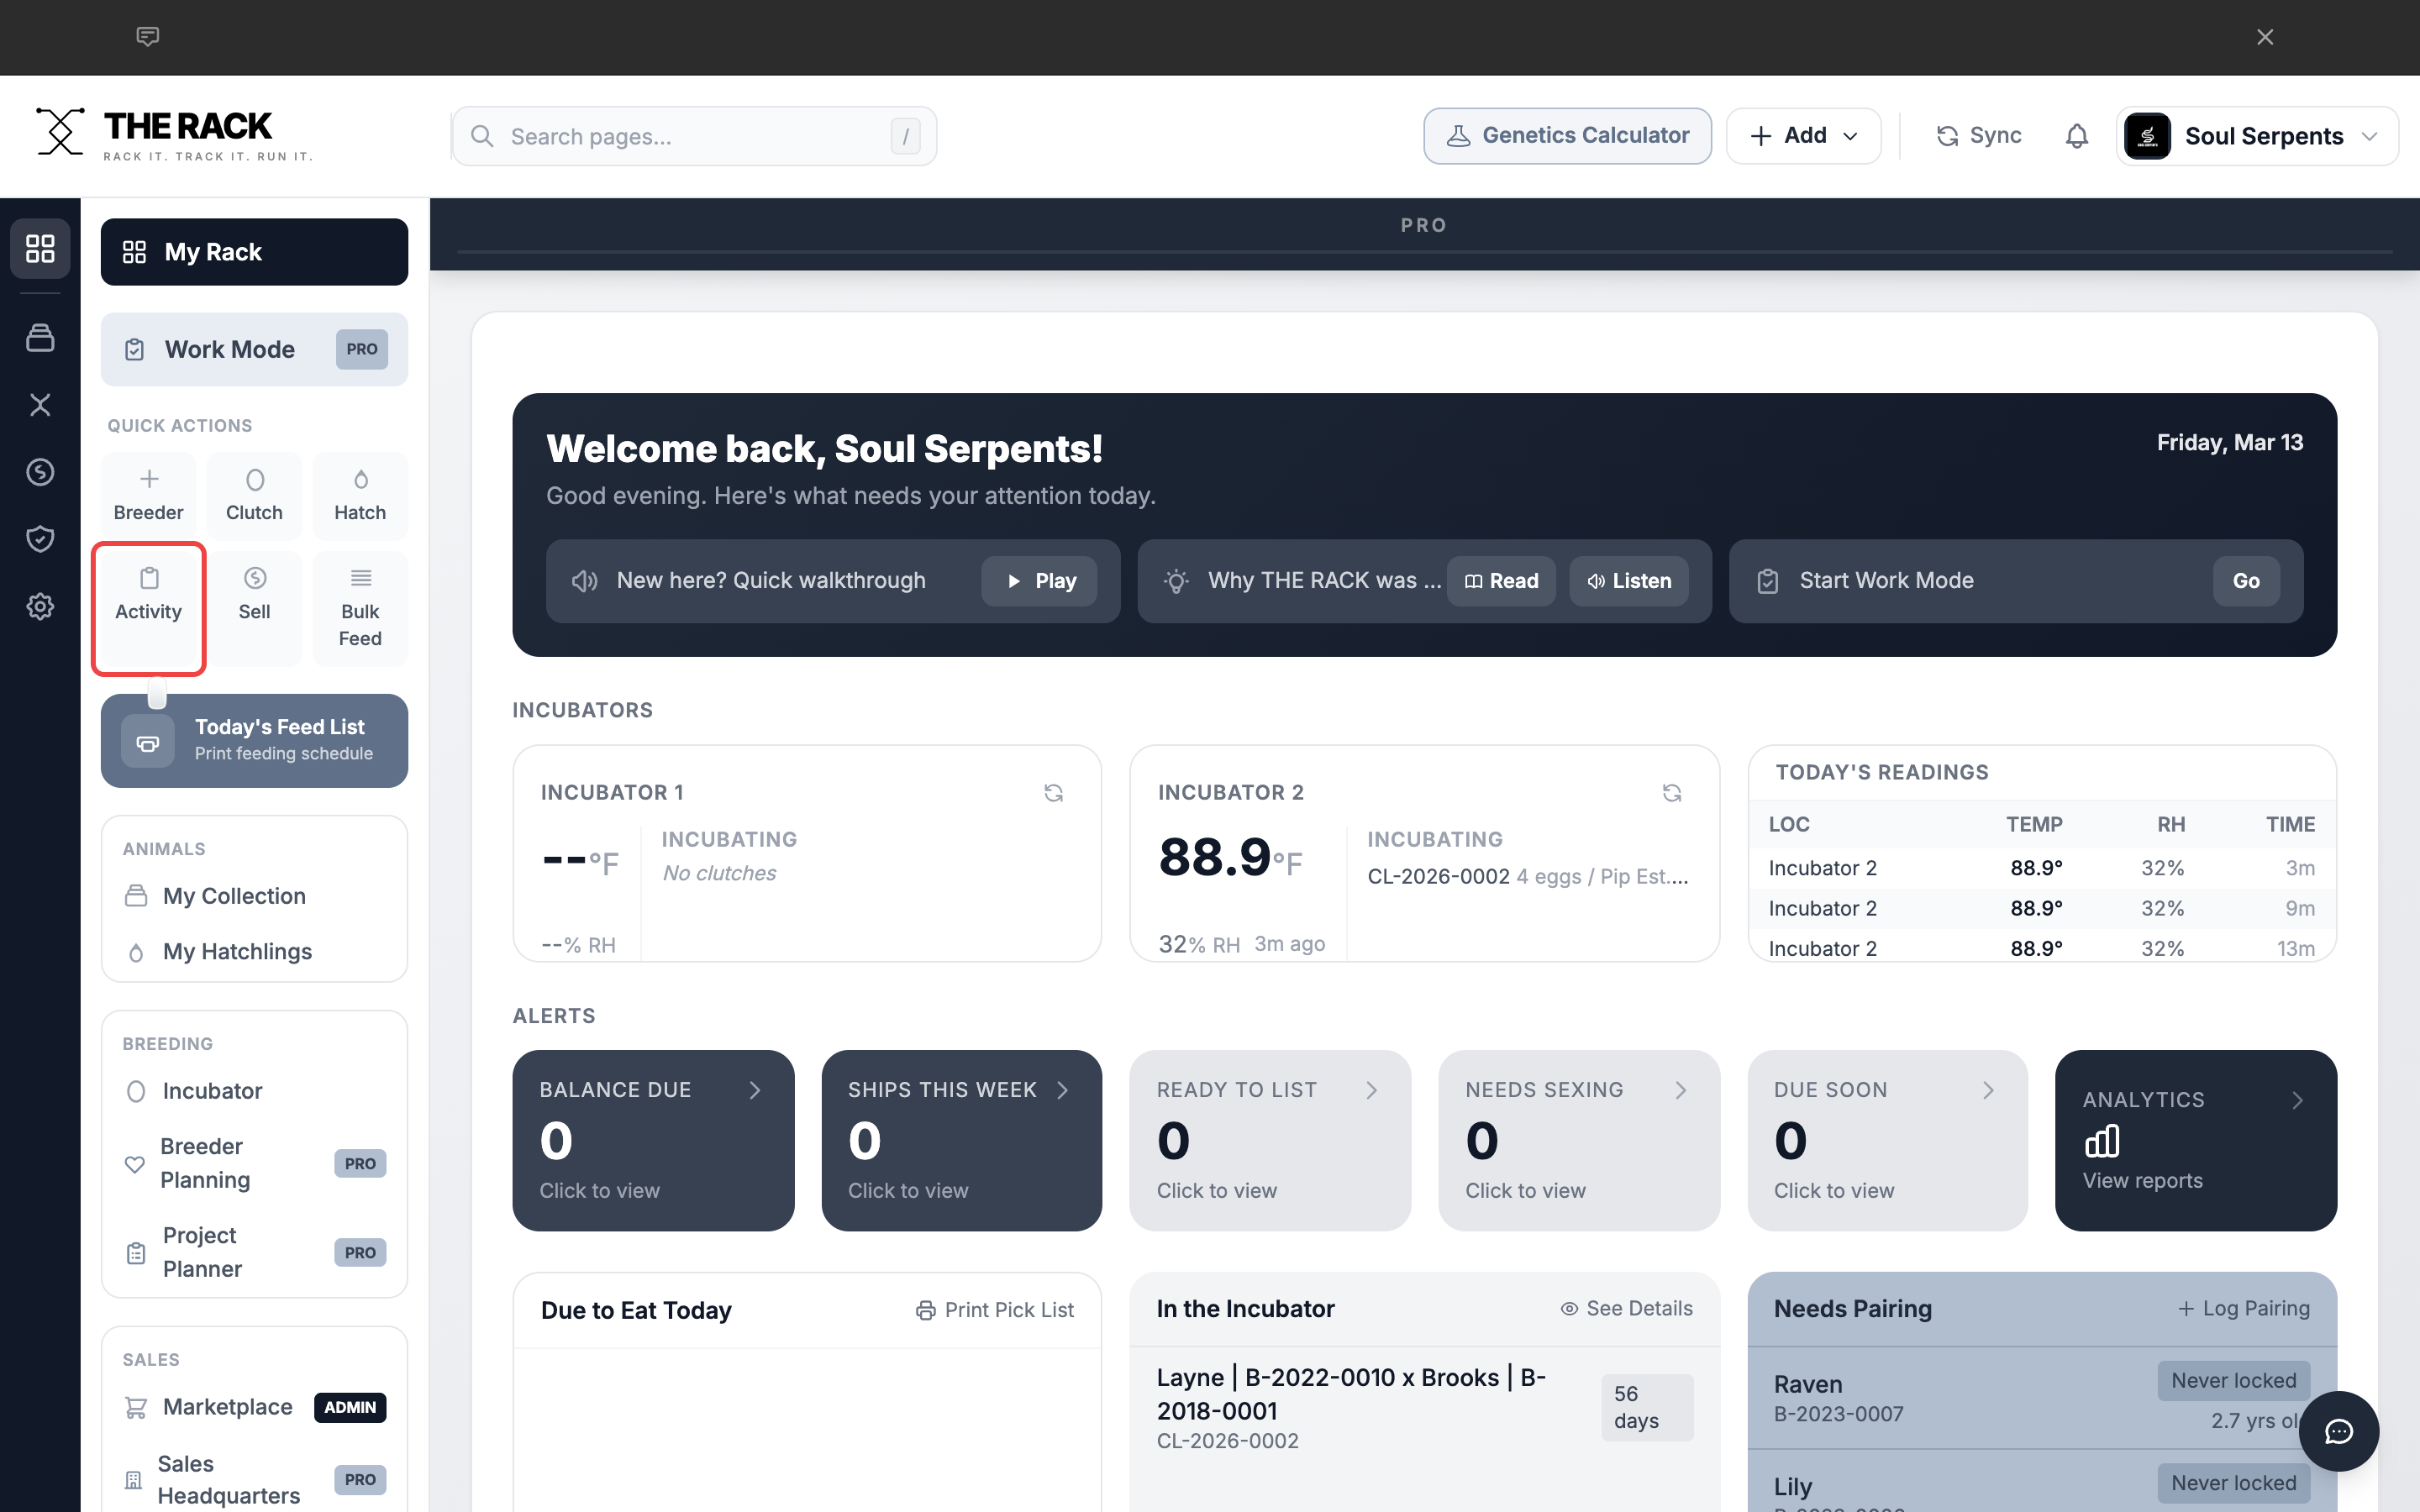
The Activity button is in the Quick Actions section of the sidebar.
Step 2: Select an Animal
The first field is Select Animal. Start typing a name or ID and the search will filter your collection in real time. Click the animal you want to log the activity for.
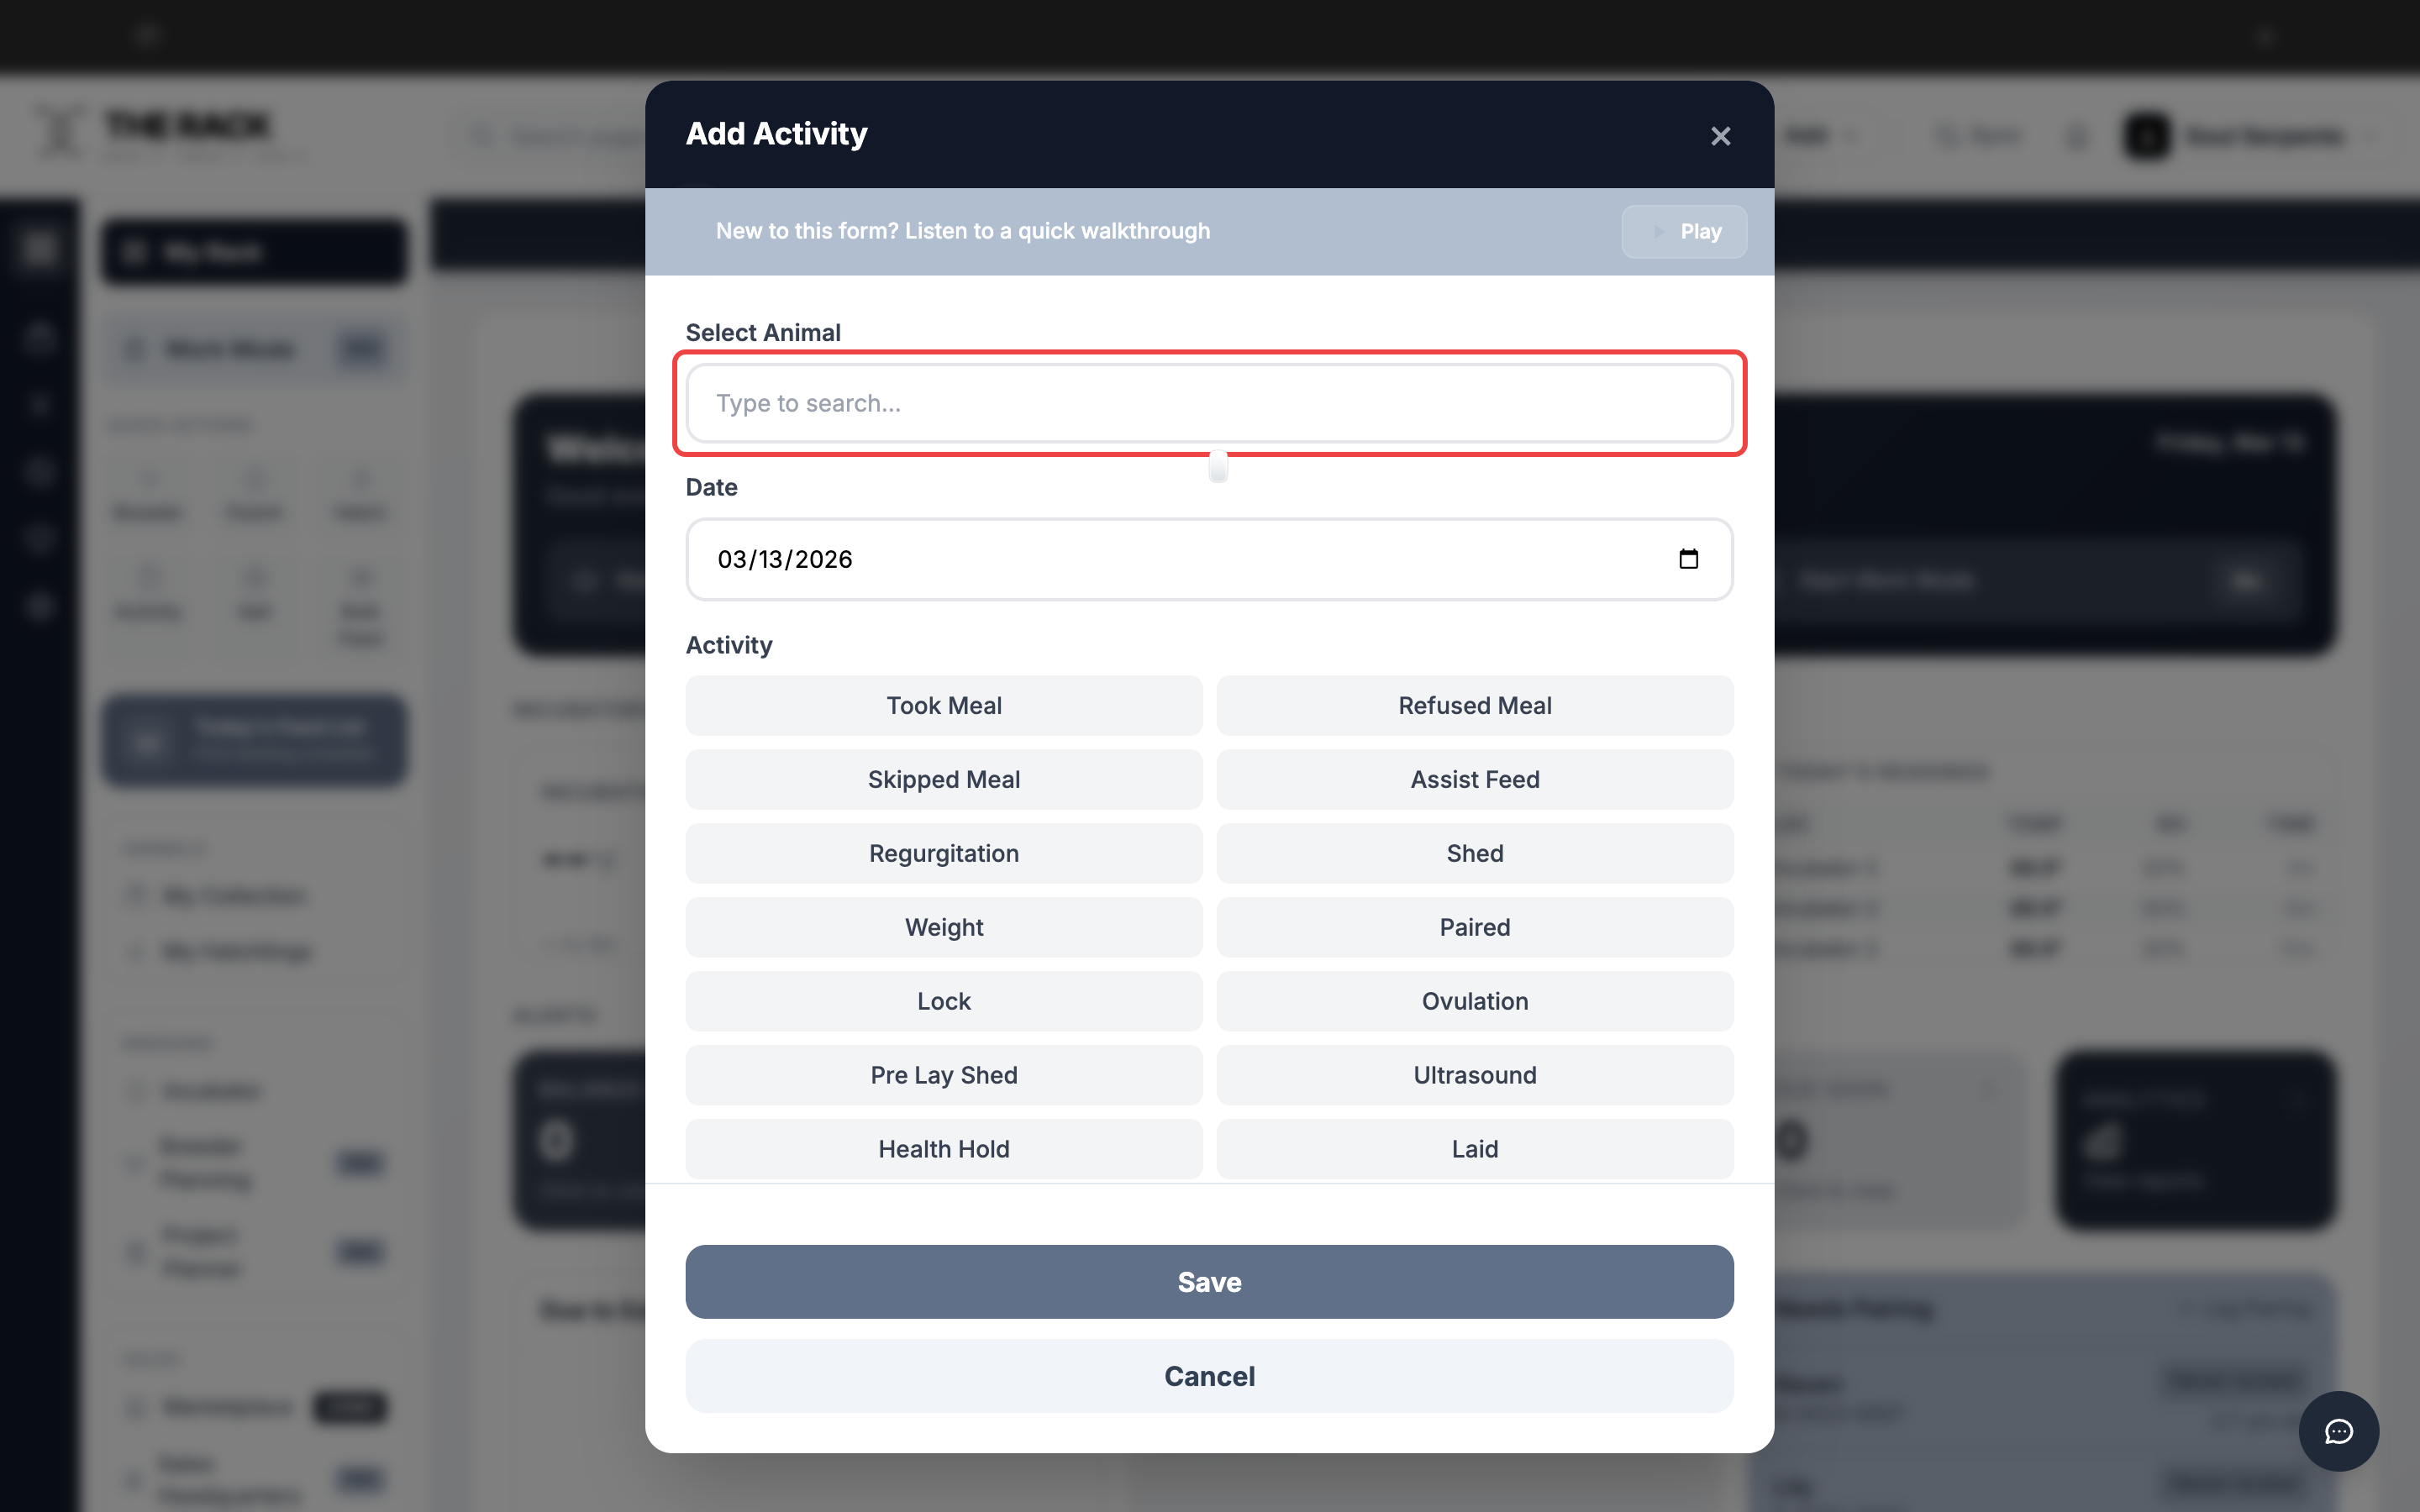
Type to search for an animal by name or ID.
Every activity feeds your whole system
One Entry. Dashboard. Pipeline. Analytics. Timeline.
Every activity you log in THE RACK flows into your Dashboard stats, Breeding Pipeline, Feeding Analysis, Health Dashboard, and the animal's timeline. Log once, see the impact everywhere.
See Activity LoggingStep 3: Choose an Activity Type
Below the date field is the Activity button grid. Click the type of activity you are logging. The selected button turns dark to confirm your choice.
| Activity | When to Use |
|---|---|
| Took Meal | Animal successfully ate. Updates next feeding due date. |
| Refused Meal | Animal was offered food and refused. |
| Skipped Meal | You chose not to offer food (travel, pre-breeding fast, etc.). |
| Assist Feed | Animal required assistance to eat. |
| Regurgitation | Animal regurgitated a meal. |
| Shed | Animal completed a shed cycle. |
| Weight | Record a weight measurement in grams. |
| Paired | Introduced male and female for breeding. |
| Lock | Confirmed breeding lock observed. |
| Ovulation | Female ovulation confirmed. |
| Pre Lay Shed | Female completed her pre-lay shed. |
| Ultrasound | Record ultrasound findings. |
| Health Hold | Flag an animal for health monitoring. |
| Laid | Female laid eggs. Creates a clutch record. |
| Quarantine | Place an animal into quarantine status. |
| Deceased | Record an animal's death. |
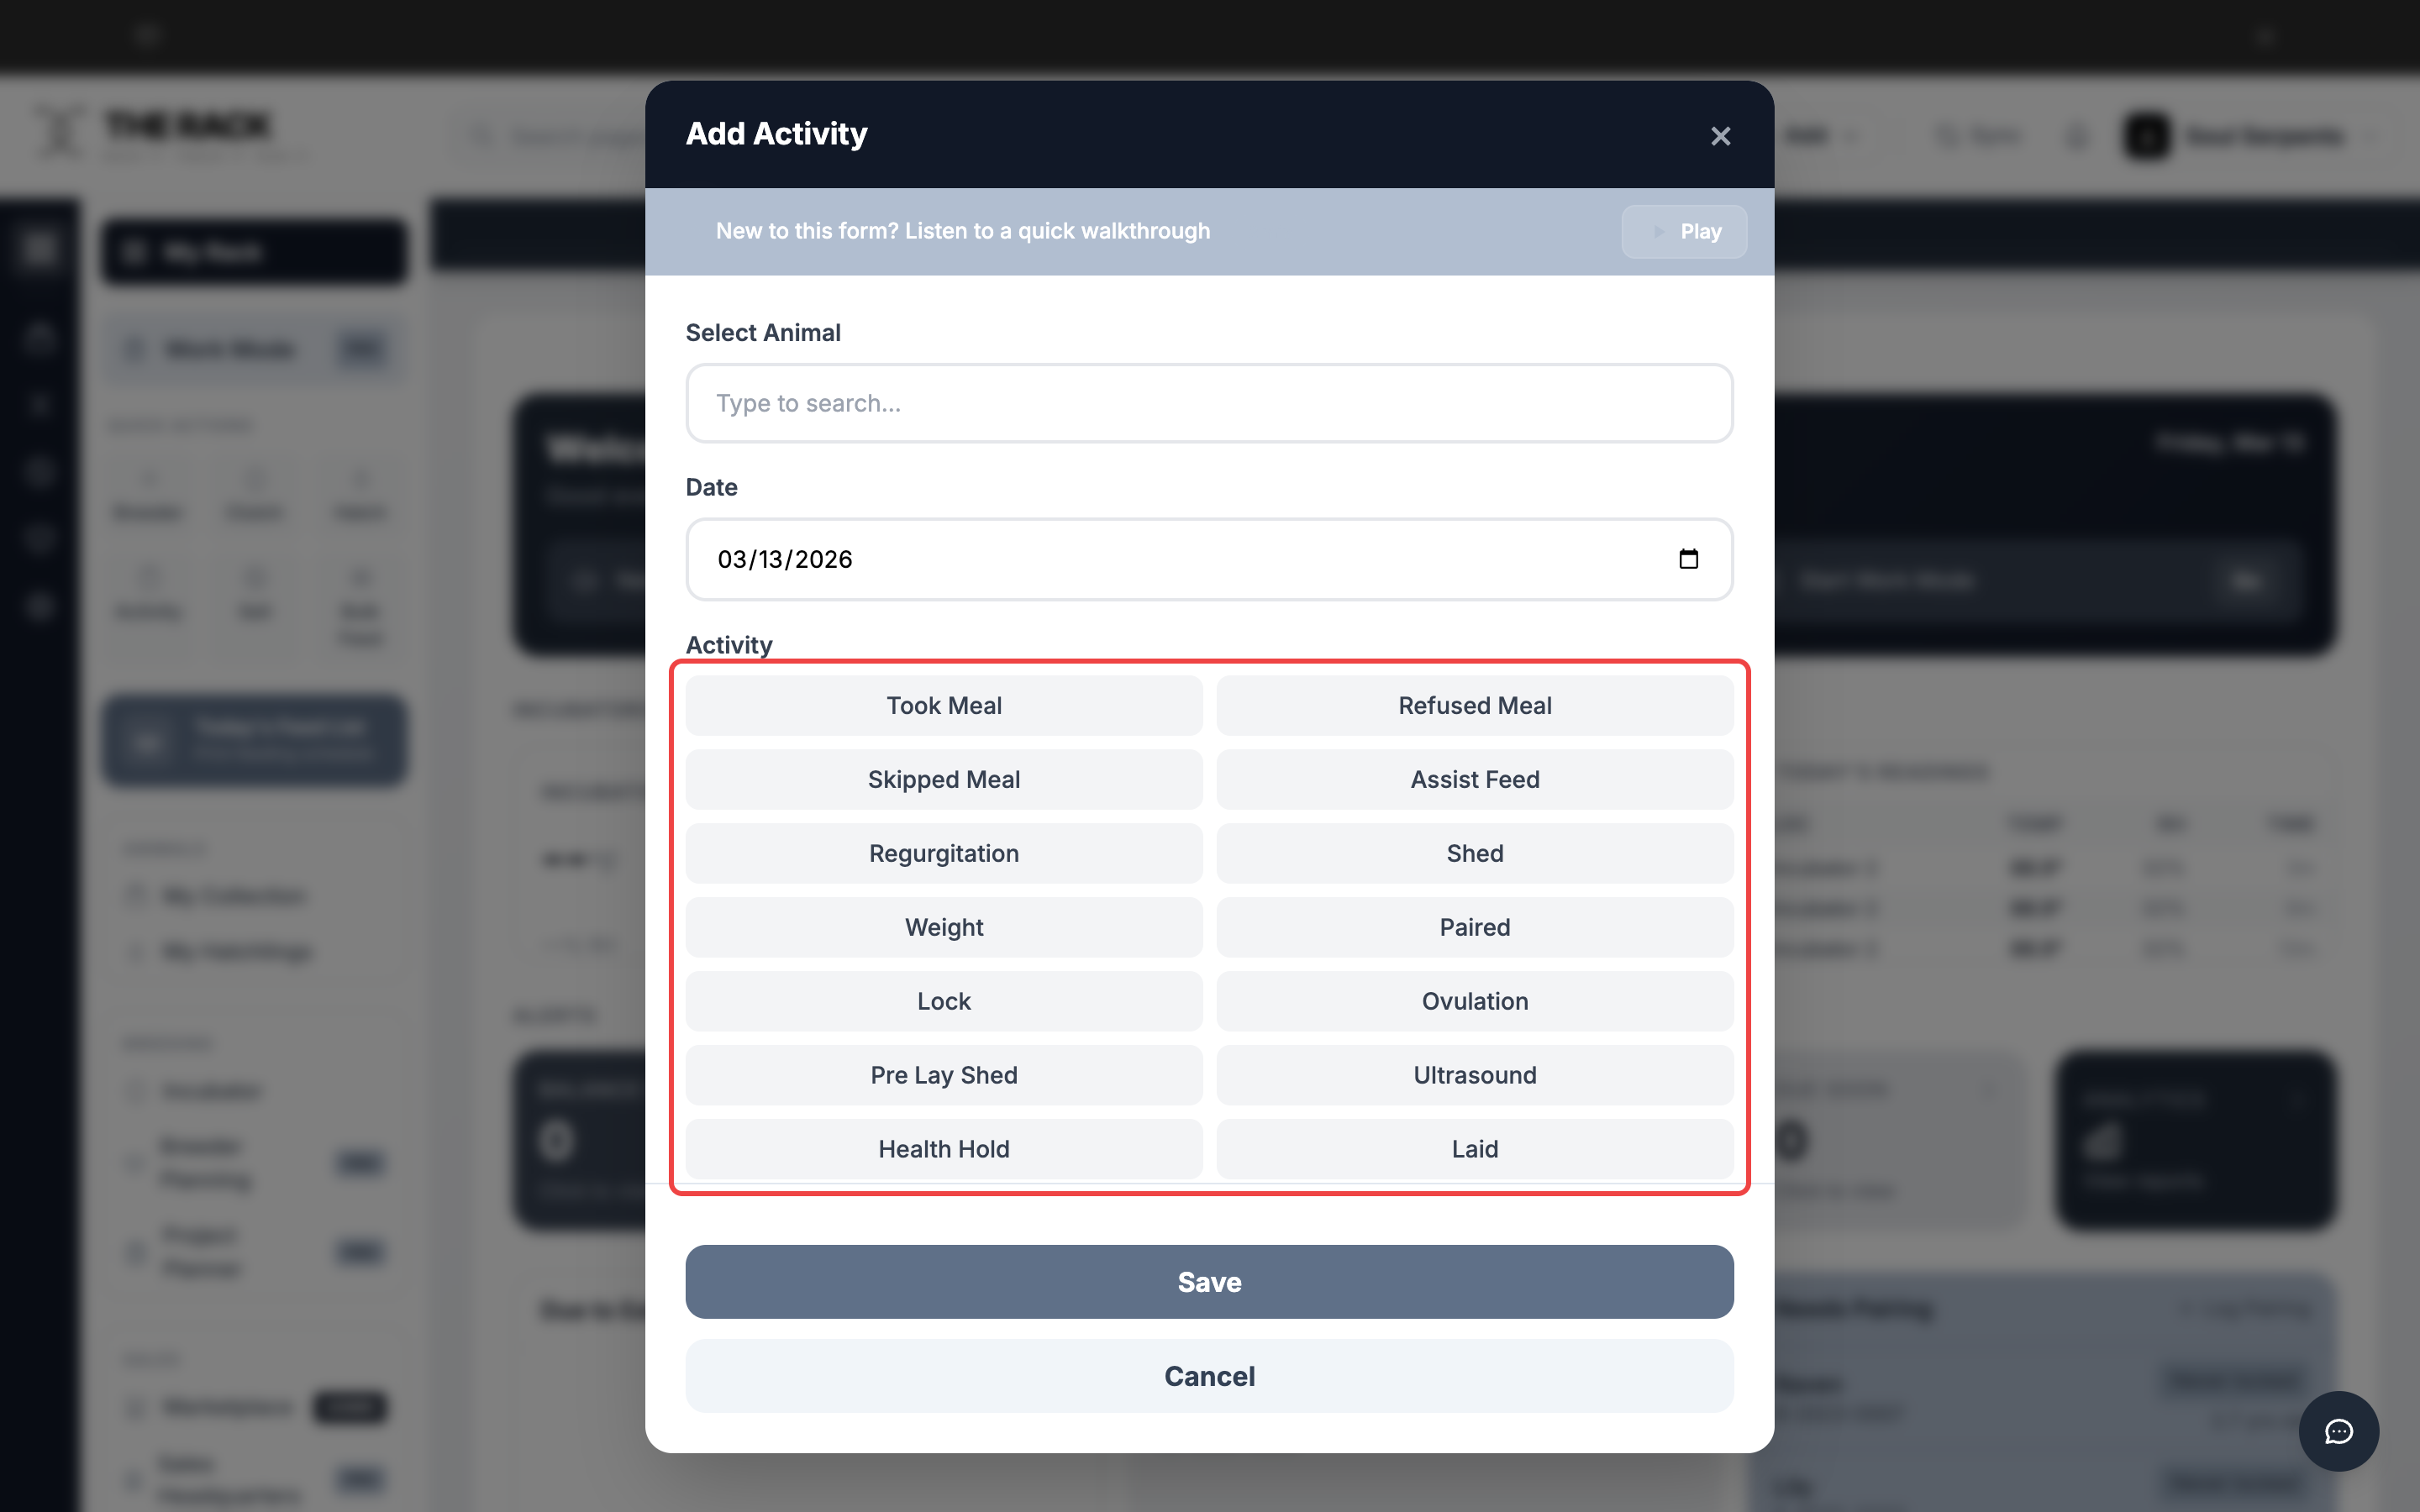
Click an activity type to select it. The button turns dark to confirm your selection.
Step 4: Set the Date
The Date field defaults to today. If you are logging an activity from a previous day, click the date field and select the correct date.
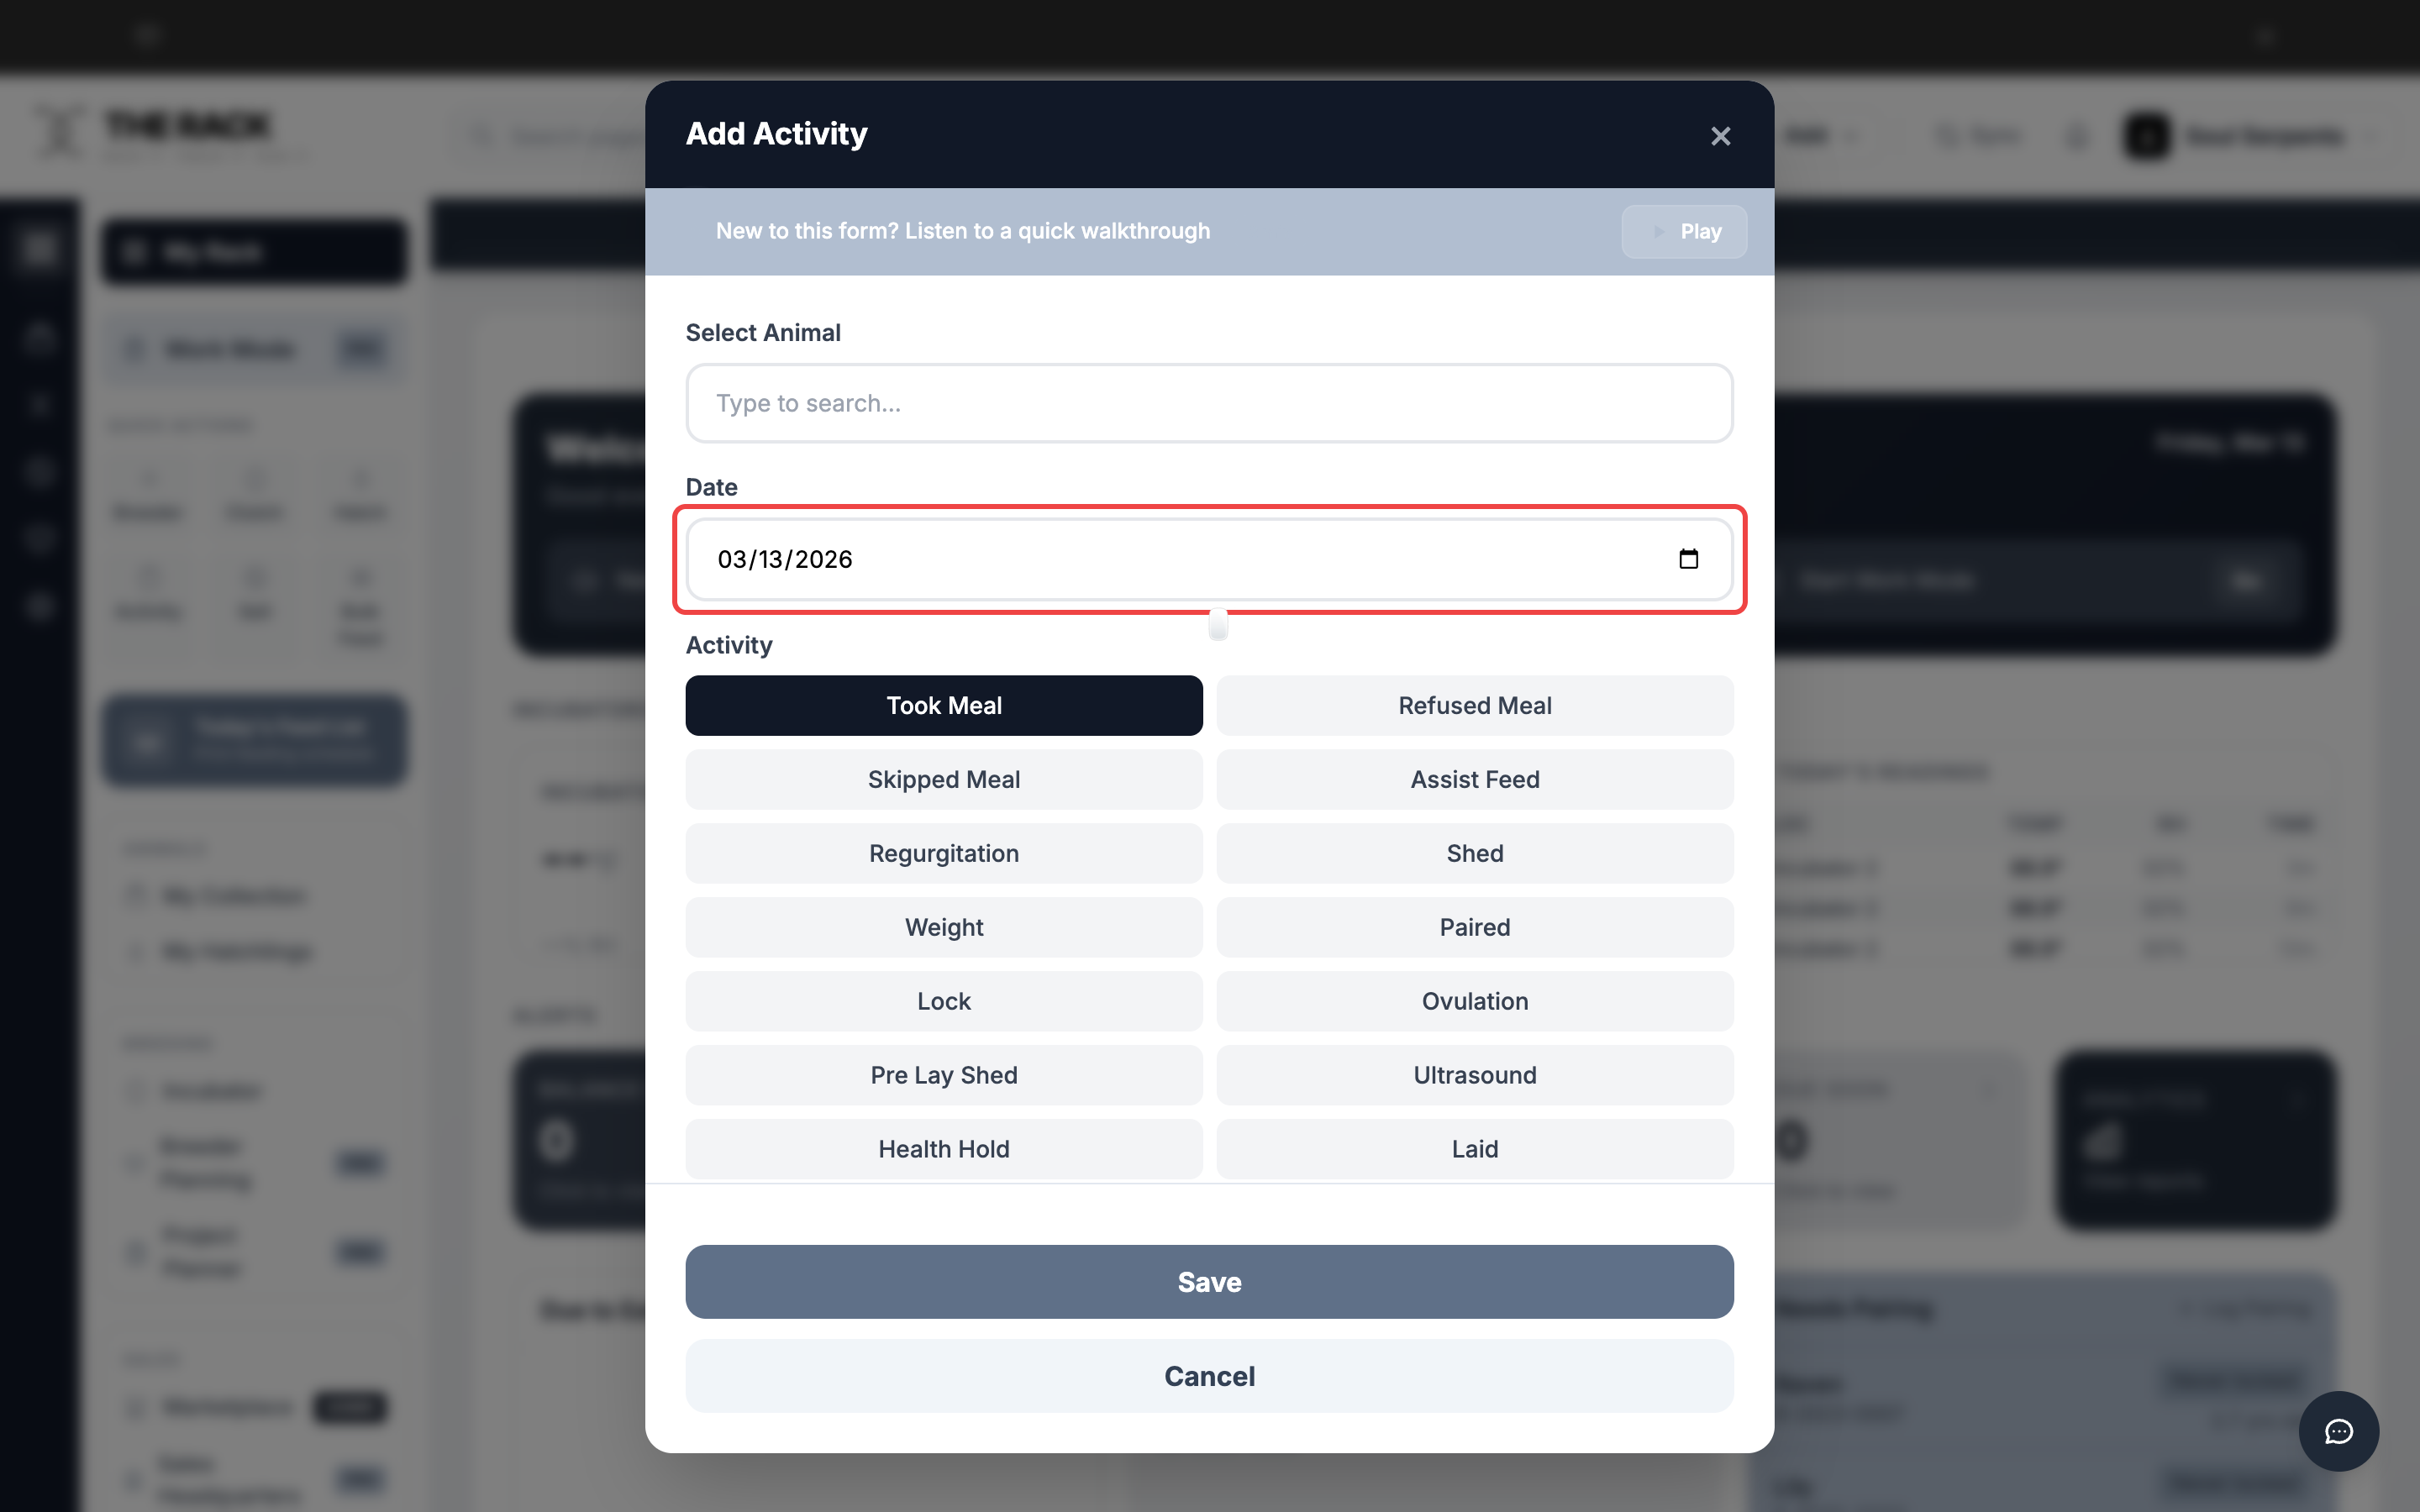
The date defaults to today. Click to change it if logging a past activity.
Step 5: Add Notes and Save
Below the activity buttons is an optional Notes field. Use it to add any context: "refused after 30 min," "shed was clean," "paired at 11pm," etc.
When everything looks right, click Save. The activity is logged to the animal's timeline immediately. After saving, the form resets so you can quickly log another activity for a different animal.
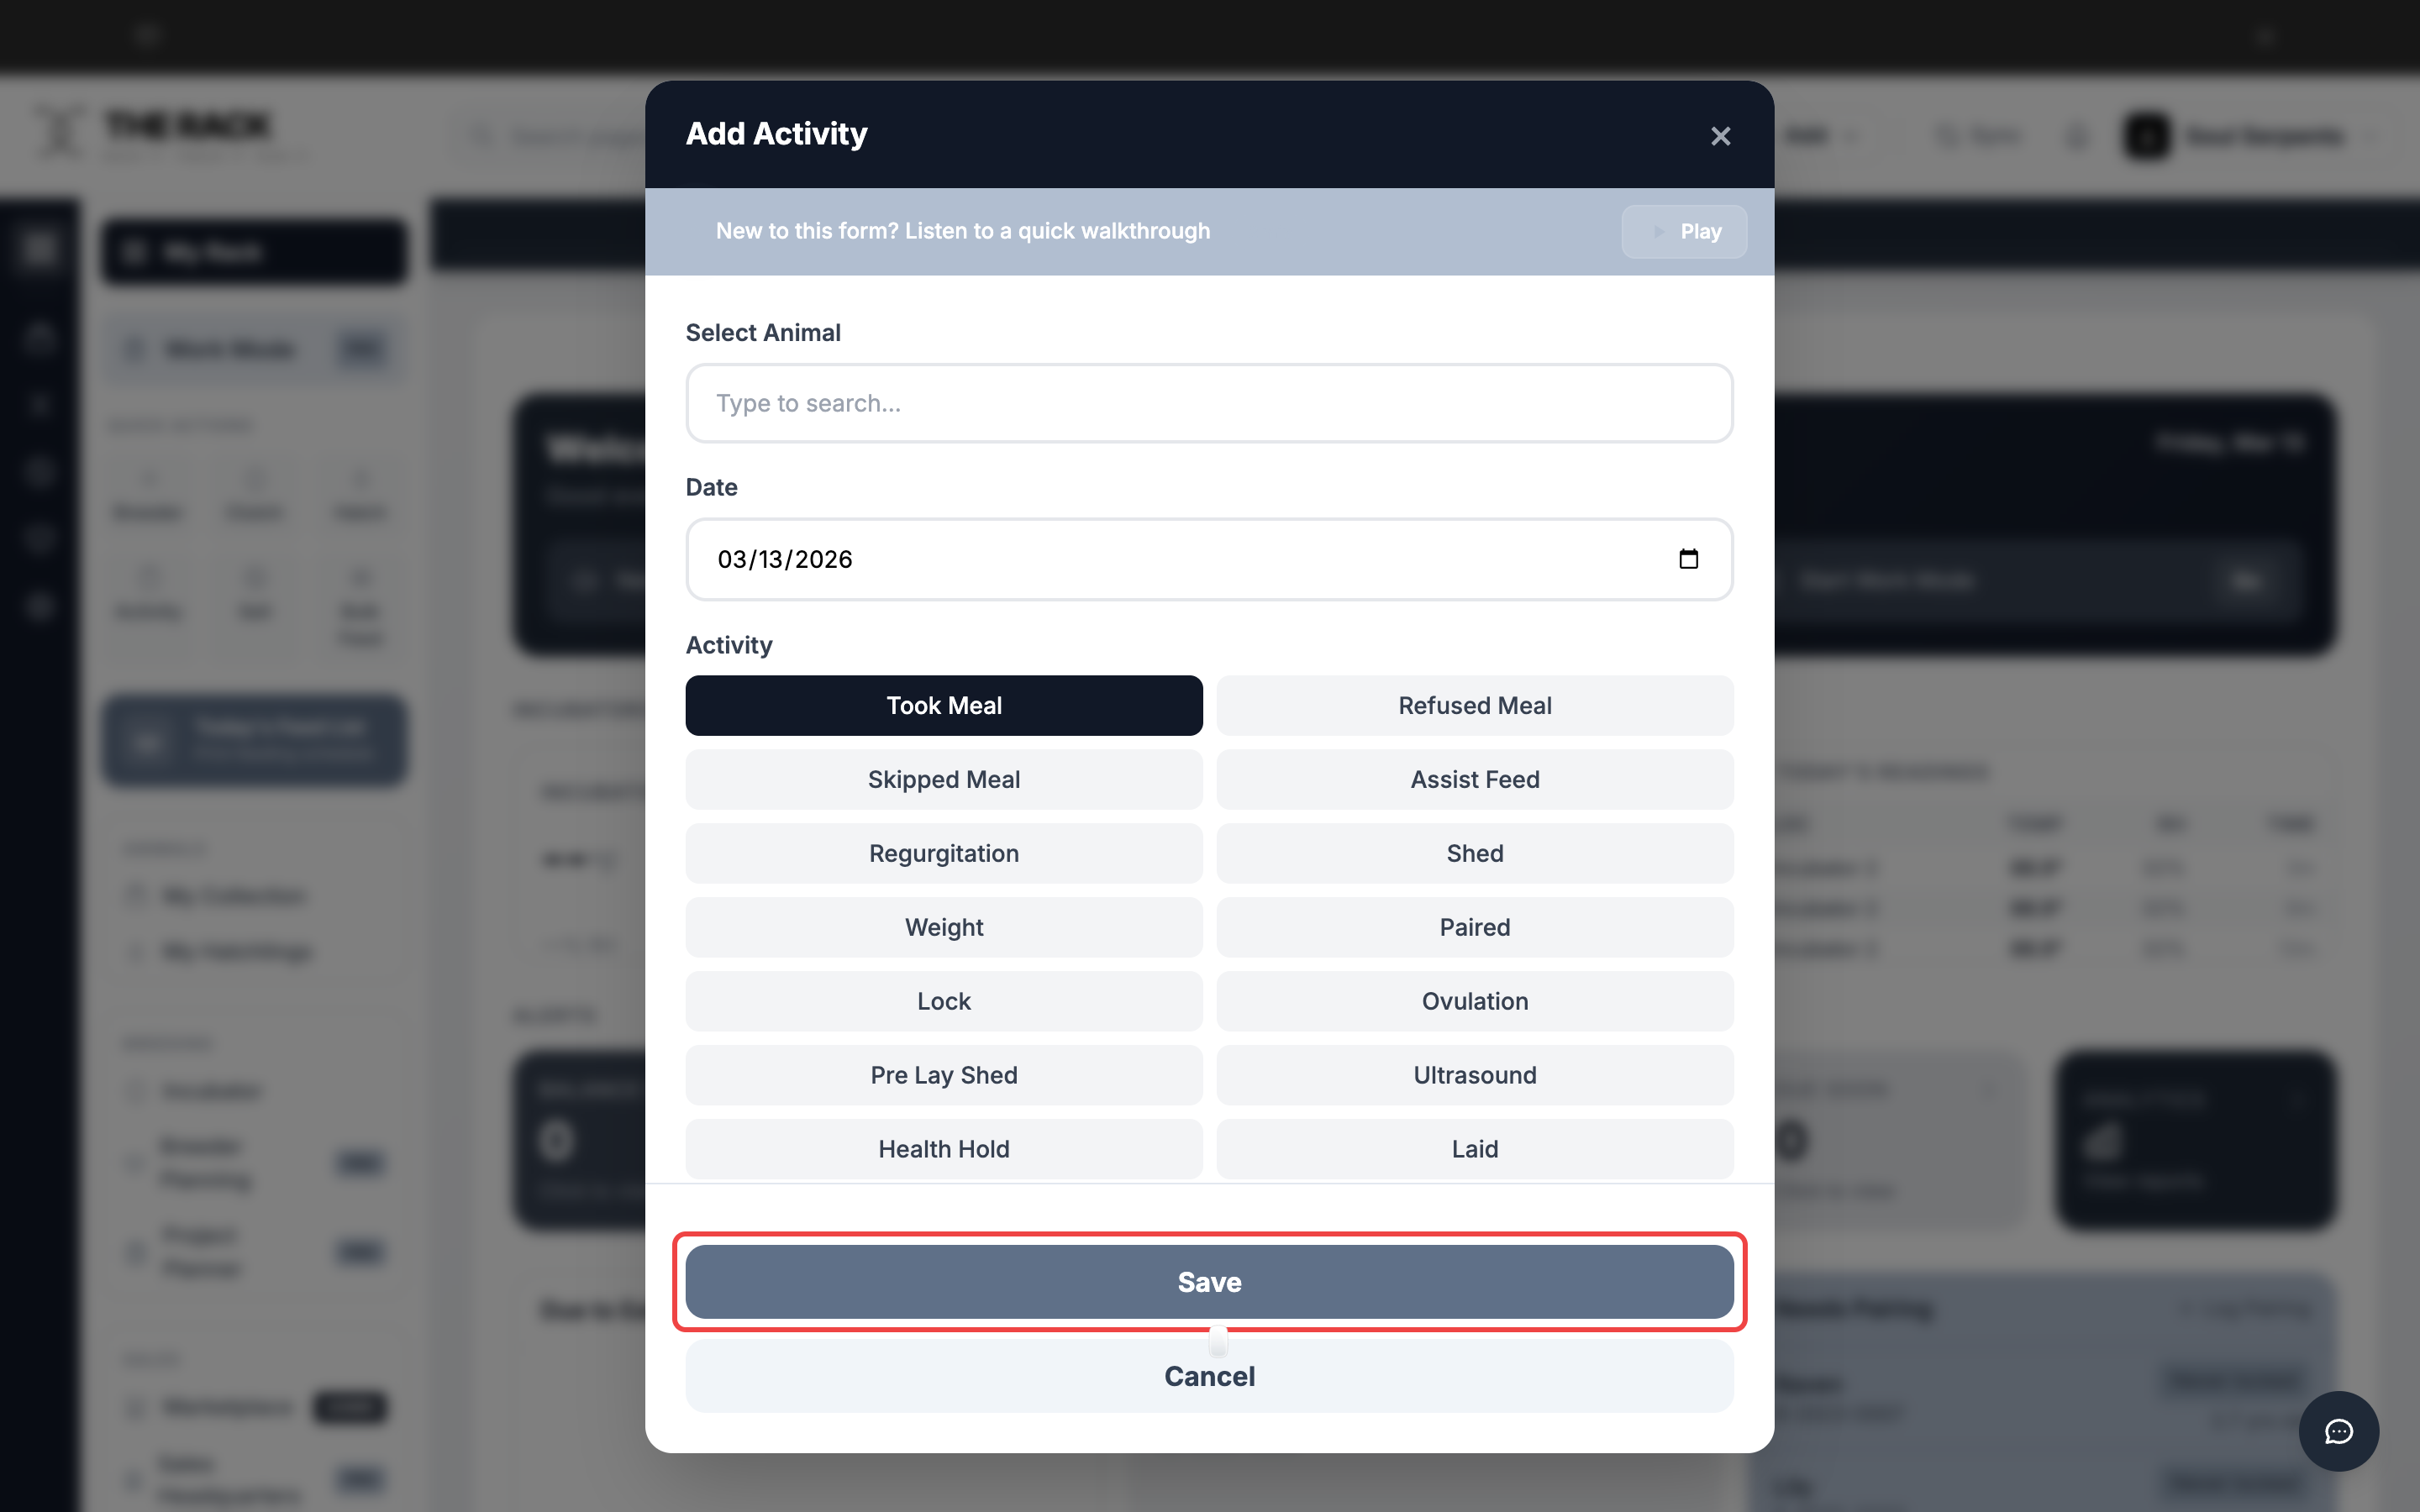
Click Save to log the activity. The form resets for your next entry.
Step 6: QR Code Shortcut
If you have QR codes printed for your animals, you can scan a code with your phone camera to open the Activity form with that animal pre-selected.
This is the fastest way to log activities during snake room rounds. Scan, pick the activity type, save. No searching required.
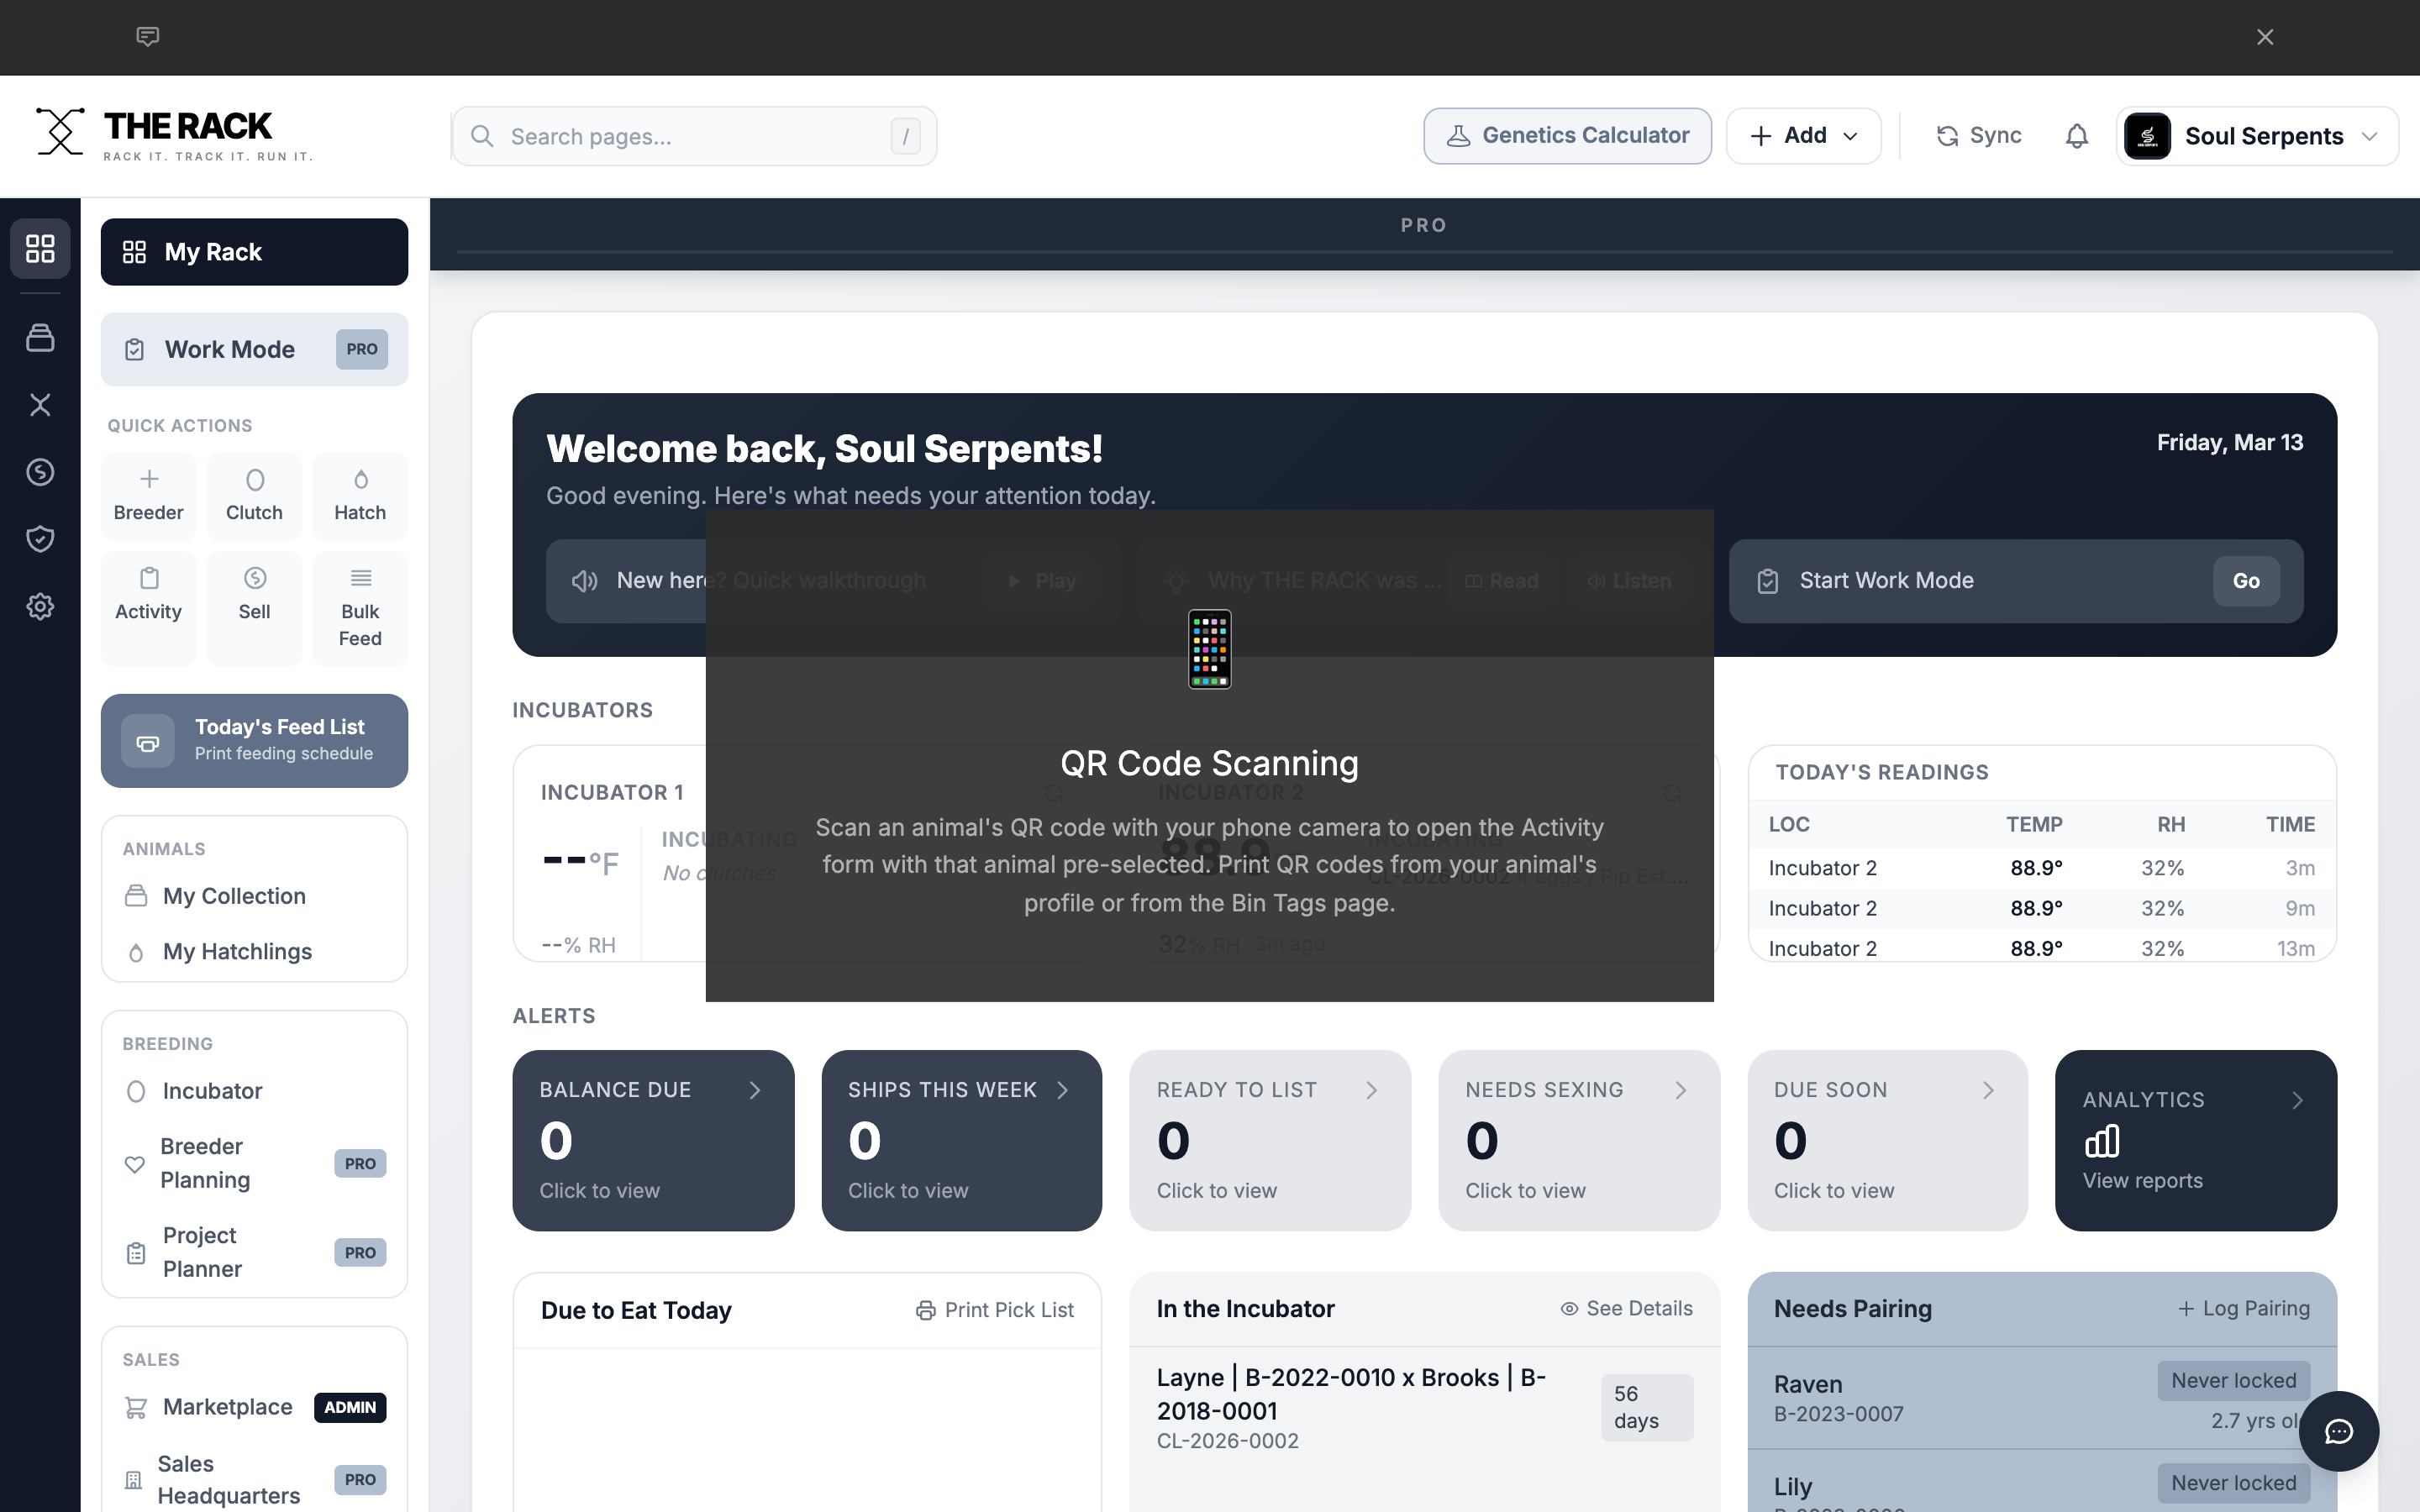
Scan an animal's QR code to open the Activity form with that animal pre-selected.
Step 7: Bulk Feed
If you are feeding multiple animals the same prey at the same time, use the Bulk Feed button in the sidebar instead of logging each one individually. Bulk Feed lets you select multiple animals, choose a prey type and size, and log all feedings in one action.
Step 8: Where Activities Show Up
Every activity you log flows into multiple parts of THE RACK automatically:
| Location | What You Will See |
|---|---|
| Animal Profile | Full activity timeline showing every logged event. |
| Dashboard | Activity This Month stats. Due to Eat Today and Needs Pairing tables adjust. |
| Breeding Pipeline | Paired, Lock, Ovulation, Pre Lay Shed, and Laid activities move females through pipeline stages. |
| Feeding Analysis | Feeding costs and frequency data for cost-per-animal reporting. |
| Health Dashboard | Weight, ultrasound, and shed data for health monitoring. |
| All Activity | Searchable log of every activity across your entire program. |
The More You Log
The more consistently you log, the more useful THE RACK becomes. Even a simple "Took Meal" entry keeps your feeding schedules, cost tracking, and sales readiness accurate.
Screenshots and instructions verified against THE RACK v2.0. Last reviewed April 2026.
Built by a Breeder
Log Once,
See It Everywhere
One activity entry updates your Dashboard, Pipeline, Feeding Analysis, and Health Dashboard. THE RACK is facility management software that works the way your snake room does.
See THE RACKFree for up to 5 animals. Keeper $10/mo. Breeder $20/mo. 7-day money-back guarantee.